


Adding images to your WordPress website makes your content more engaging and visually appealing. Follow these simple steps to upload and insert images into your posts or pages.

Table of Contents
- Upload an Image to the Media Library
- Add an Image to a Post or Page
- Adjust Image Settings
- Set a Featured Image
- Optimise Images for Better Performance
Upload an Image to the Media Library
To upload an image to WordPress, follow these steps:
- Go to Media > Library in your WordPress dashboard.

- Click Add New.

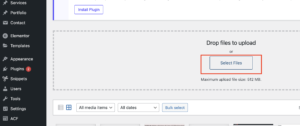
- Drag and drop an image or click Select Files to upload from your computer.
Add an Image to a Post or Page
To insert an image into a post or page:
- Open a post or page in the editor.
- Click the + button to add a new block.
- Select Image from the block options.
- Choose an image from the Media Library or upload a new one.
Adjust Image Settings
After inserting an image, you can adjust its settings:
- Click on the image to see the toolbar.
- Use the alignment buttons to position the image.
- Resize the image by dragging its corners.
- Click Block Settings to add alt text and captions.
Set a Featured Image
To set a featured image:
- In the post editor, go to the Featured Image section.
- Click Set Featured Image.
- Select an image from the Media Library or upload a new one.
- Click Set Featured Image to confirm.
Optimise Images for Better Performance
Optimising images helps improve your website speed. Here’s how:
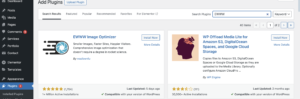
- Use an image optimisation plugin like Smush or EWWW Image Optimizer.
- Save images in JPEG or WebP format for smaller file sizes.
- Resize images before uploading to match your content width.
Now you know how to add and manage images in WordPress. Using high-quality and optimised images will enhance your site’s appearance and performance.
Need help managing your WordPress site? Get expert WordPress support today!